

 areyis

Ok first things first, make a folder and put all of the pictures you want in the gallery into it. For my example, I made a folder called "drawings."
Then create a folder for where you want the thumbnails and webpage for your gallery to end up in, such as "web gallery."
Now open up photoshop and go to File > Automate > Web Photo Gallery

You will then see this screen come up
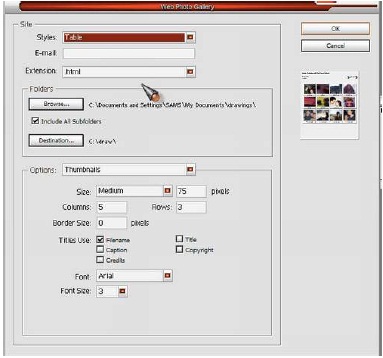
Pick what kind of style you want your gallery to be, For this example, I chose "table."

Then if you want you can put your email (it will be displayed at the top of the web page) and pick your file extension to use (I used .html as that's the most common type of page found online). If other pages in your website are different you might prefer to match the gallery extention to it. Now choose the folder that you created in the begining of the tutorial

Then choose your destination folder that you created in the begining
Next you will see the gallery options wizard. In the drop down menu select "Banner"

Create a name for your gallery (I used "Samwise Didier Illustrations") and fill out all relevant fields, customized with your information (i.e. Photographer,Contact Info, the date, font face and size)

For the other options such as Large Images, Thumbnails, Custom Colors and Security we'll leave at the default settings.
Press "OK" and then you will see the process of the images opening and being reduced to thumbnails
Now upload all of the folders and files that you created in the destination folder to your website. Here's what mine would look like :

 Posted in: about photoshop,basic photoshop,CS 3,CS 4,CS 5,Photoshop,photoshop tutorials


1 comments:
nice,thanks for share this
Post a Comment