

 areyis


This time we try to make a effect abaout
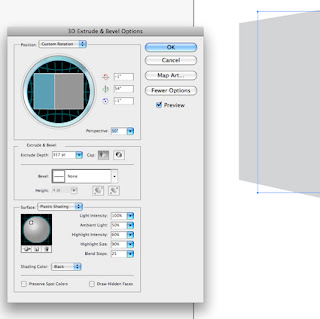
First use the Rectangle tool to draw a white square. Then go to 3D>Extrude and Bevel.

Make sure you have the Preview box ticked, then rotate the cube side-on, and adjust the Extrude Depth so that it’s the same depth as your square – therefore making it a cube.

Put the Perspective at 50%, and rotate the cube to a position that will suit where you will be placing it in your photo. When you’re done click OK.
Copy your cube and paste it into your photo in Photoshop

Copy your cube and paste it into your photo in Photoshop

Rasterize the layer, and duplicate it twice. Name them as I have above, and hide the bottom and top layer, leaving only the middle one visible.

Go to Image>Adjustments>Color Balance and give your cube a blue tint.


Then double click on the layer thumbnail to bring up the Layer Style box. Click on Outer Glow. Set the Opacity to 20%, the Size to 30% and set the colour to white.


Next click on Inner Glow. Set the Opacity to 25, and the Size to 35% and set the colour to white.

Click OK, then take the layer’s Opacity down to 85%.
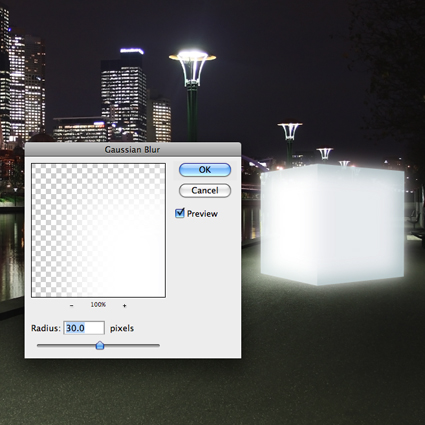

Now we’ll add a glow. Click on the glow layer, and unhide it.

Go to Image>Adjustments>Brightness/Contrast and set the Brightness to 70.

Then go to Filter>Blur>Gaussian Blur and set the Radius to 30 pixels.

Next go to Filter>Blur>Motion Blur , set the Angle to 90 and the Distance to 500 pixels.

Change the layers blending mode to Overlay.

Here’s the final result.


 Posted in: about photoshop,advance tutorials,andesta blog,CS 3,CS 4,Photoshop,photoshop tutorials


0 comments:
Post a Comment