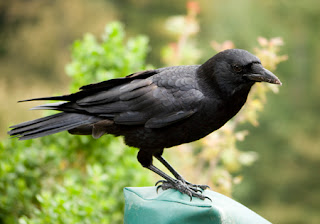
Changing an object from one colour to another is simple in Photoshop – but changing something from black to white is a little more complicated.
In this in-depth tutorial I’ll show you how to take something completely black and turn it white, whilst keeping it looking natural and realistic.
Once you have opened the photo in Photoshop, use the Quick Selection tool and the Refine Edge options to make a selection of the crow, and make the selection a new layer with a layer maskDuplicate the new layer so you have two. Hide the bottom two layers (we’ll use them later), and desaturate the top layer.
With the top layer still selected, go to Image>Adjustments> Shadows/Highlights.Bring the Shadows amount up to 50%, and leave the Highlights at 0%
Next, go to Image>Adjustments>Brightness/Contrast.Bring the Brightness up to 80, and take the Contrast down to -20
We have now lightened the bird considerably – but as a result it’s looking a little flat, and needs some extra contrast in certain areas
next,
Add a Solid Color adjustment layer using the colour ‘ffcc00′. Set the blending mode to Screen, and the opacity to 25%, and add a clipping mask
Those shadow areas still aren’t dark enough, so next we’ll use the original photo to bring back some black to these areas
Make sure you bottom layer is visible and go to the layer mask of the white layer
so we can see
now go to duplicated layer from earlier to bring back a little more colour and unhide this Bring up the layer’s Saturation to 60
Now, change it’s blending mode to Color, and it’s opacity to 35%, and apply a clipping mask, Create a new layer above all the other layers, and set it’s blending mode to Overlay, and it’s Opacity to 35%. so Your layers panel should end up looking like the one above
And here’s the final result


 areyis


 Posted in:


0 comments:
Post a Comment