

 areyis


First of all, using Google search find some appropriate image to create the texture from it. I prefer to use this one. Also feel free to use your own pictures. Now create a new document sized 1000×500 pixels and bring out picture into it.
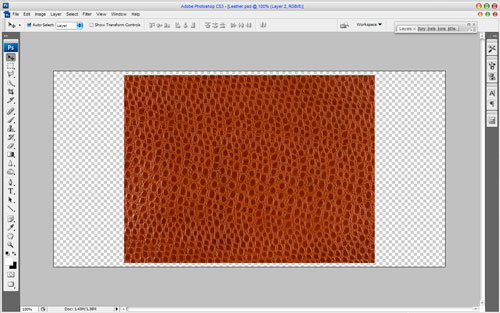
Duplicate this layer with Ctrl+J and move two of these layers like on picture below. Use the Eraser Tool and a soft round brush with brush size about 100 px to make texture edges softer.

Ok, merge two of these layers. Now I would like to begin stylization process. To change the color use Image > Adjustments > Hue/Saturation with similar settings to these:

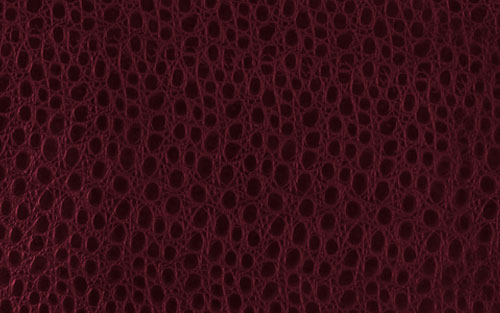
Your image should look like mine:
Now I would like to make the texture more contrast. For this effect use Image > Adjustments > Brightness/Contrast with the next presets:

See the difference:

To finish off stylization process apply Inner Glow layer style for your texture layer:

Now we have something like this:

Alright, time to write out your text. ll just be using the font called Arial Black (230 pt, Sharp). Write out something like on a picture below in the middle of canvas using Horizontal Type Tool.

Before you will start to create leather style text effect you need to find some texture for this text effect or feel free to use mine. Open up this texture. I think we can bring more interesting effect to this texture. Create a new file sized 75Ñ…225 pixels and copy the texture onto it. Then using the Rectangular Marquee Tool create selection like on a picture below and fill it with black to transparent linear gradient:

Then use Edit > Define Pattern to save this picture as pattern. We can close this file without saving. Also you need to create one more texture. Create a new document sized 10×10 pixels and using the Pencil Tool draw black and white squares like below:

Use Edit > Define Pattern again to save this picture as pattern. Go back to our created file and apply the Drop Shadow, Inner Shadow, Inner Glow, Bevel and Emboss, Contour, Texture, Satin, Pattern Overlay and Stroke layer styles to this text layer:


And now we have the text style like this one below:

Well, I think Ive pretty much explained all I can for this tutorial. Enjoy!
 Posted in: about photoshop,andesta blog,Photoshop,photoshop tutorials,Text Effect


0 comments:
Post a Comment