

 areyis


Created a new document sized 1000×500 pixels with all the default settings, RGB, 72 dpi, transparent background etc. Then find some appropriate fabric texture. Actually, you can use Google Images to find the texture or feel free to use mine. Open up the texture and copy it to the canvas.

Now, duplicate this texture three of times and combine as below. Be attentive that texture edges are different (you can see arrows on the borders).

Use the Eraser Tool and a soft round brush about 50 ps to make the edge of textures softer and invisible.

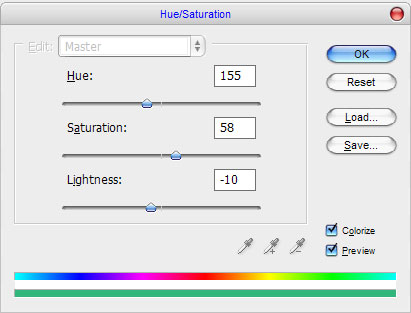
Ok, merge all of texture layers in one and apply Image > Adjustments > Hue/Saturation.
You should have the result similar to this:

Make texture clearer with Sharpen Tool:

Ok, we are done with background. Lets start to create text effect. Get out the Horizontal Type Tool and write out your text, for example in whatever color you want. I’ve used a font called Arial Black (300 pt, Crisp). This is standard Windows font.

After that change fill opacity to 85% for this layer and begin to create text effect. First of all we need to add some pattern to Photoshop patterns palette to use it for creating text effect later. Open this texture or find another one using Google Images and use Edit > Define Pattern to save this picture as pattern. Go back to our created file and apply the following layer styles to the text layer:


Now your image should now look like the image shown below:

Well, we done for this tutorial! Enjoy your own cool fabric text effect.
 Posted in: about photoshop,andesta blog,basic photoshop,Photoshop,photoshop tutorials,Text Effect


0 comments:
Post a Comment