

 areyis

In this tutorial we are going to create a very cool looking Girl wallpaper. In this tutorial we will combine digital painting, some design elements and a photo to create an amazing wallpaper with photoshop


Create a new document with these dimensions.
I Found a stock image on deviantart.com - http://tatehemlock.deviantart.com/art/The-Act-of-Being-Polite-02-141273558

Open this image in a separate document. Our goal is to crop the girl from the background. There are many ways to do that, but in this situation I recommend you to use Magic Eraser tool - I think it is called so.
So let's start erasing that white color.

The Magic eraser does a lot to save time and it is very easy to erase monotone color backgrounds. it does a lot, but not everything - the edges of the objects do have a small edge line with different color pixel. IF you want to generate a good edged cut you must walk over the whole edge line. To view the other color pixels I recommend you to create a layer underneath the object you want to cut and fill or paint over the edges with different by contrast color.
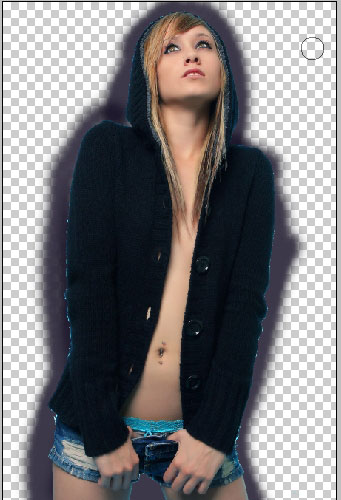
Work extremely zoomed in to see and erase all the pixels you don't need.


Now when you have clear contour you can drag the girl to our initial document.

Create a document underneath the girl layer and fill it with

color - this will be the initial color to for further color tone harmony. I choose neutral Blue.


Then choose black to white gradient - set the layer Blending mode to Pin light and make several slide with this gradient giving us something like this effect. Note to turn Pin light.

As our effect is black color, we need to choose the right layer blending mode so we can see the initial blue color. Choose - and select the one you think is good. I've chosen soft light and the result is this.

Warp it a little bit.


Now it is time to bring some contrast: select soft edged brush with low flow parameters. Create a new layer underneath the Girl layer (set the layer mode to Overlay). Select something like light blue color; apply color on the top and near the head area.


Pick another color and paint a little bit with it too.

The next thing I did was - I began to apply glow to the character - the Girl. I'm going to use layer styles for that.

I've also applied some effects like small little bubbles using custom brush (on a new layer).

Zoomed out view:

So we've started to decorate with bubble brush let's continue to do this. i have another Good brush: here are the settings of the brush of you are using pen tablet.
 Posted in: about photoshop,andesta blog,basic photoshop,CS 3,CS 4,CS 5,photo effect,Photoshop,photoshop tutorials


0 comments:
Post a Comment