

 areyis

its another tutorial to make a soccer wallpaper with photoshop

Create a new document 1280px x 1000px.

Now we’re going to create our grass background. Right click on the background layer>>blending options>>Pattern overlay and load or choose the grass pattern that you’ve downloaded.

Now go to Filter>>Render>>lighting effect

Style: Triple Spotlight, Light Type: Spotlight, Intensity: 35, Focus:100 , Gloss:0 , Material:69 ,Exposure:65 , Ambience:13 , and Texture Channel:none.


Next thing we are going to be doing is creating the actual soccer lines for our feilds. Select the rectangle tool, color:ffffff and create a nice big rectangle across the grass leaving space around the rectangle.

Now change the layer opacity to 10% and layer fill to 0. Then right click on the rectangle layer>>blending options>>stroke>> size:3px, position:inside, blend mode:normal, opacity:100,Fill Type:color, #ffffff

Now we’re going to be doing the same steps for the rest of the boxes on the field. Create a another rectangle box, color:#fffff. Now change the layer opacity to 10% and layer fill to 0. Then right click on the rectangle layer>>blending options>>stroke>> size:3px, position:inside, blend mode:normal, opacity:100, Fill Type:color, #ffffff

Create another rectangle inside of the one we’ve just created color:#ffffff. Now change the layeropacity to 10% and layer fill to 0. Then right click on the rectangle layer>>blending options>>stroke>> size:3px, position:inside, blend mode:normal, opacity:100, Fill Type:color, #ffffff

Now select the rounded rectangle tool color:#ffffff and create a small circle at the top of our rectangle.
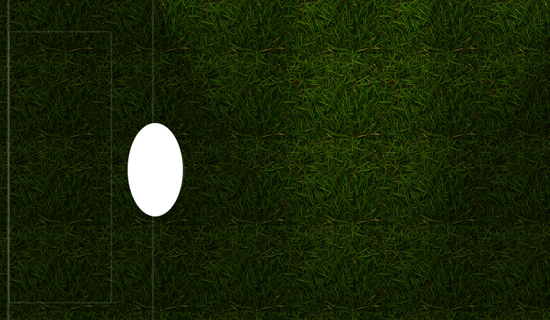
Now change the layer opacity to 10% and layer fill to 0. Then right click on the rectangle layer>>blending options>>stroke>> size:3px, position:inside, blend mode:normal, opacity:100,Fill Type:color, #ffffff. Then select the eraser tool(square brush) and just drag it down half of the circle leaving the upper half untouched.

Group all the layers we’ve just created for our soccer field lines except of the big rectangle. Then right click on the group and duplicate it. After you have duplicated the group go to Edit>>Transform>>flip horizontal.

Select the type tool, font: Arial,bold size 200px, smooth. Create a fancy text you would like to use. I used Webdevtuts for the example. Then change the text opacity to 30%.
Right click on the text layer>>blending options>>drop shadow. blend mode:multiply, opacity:100,angle:120, distance:5, spread:65, size:5,

Now select inner shadow. blend mode:multiply, opacity:100, angle:120, distance:0, spread:0,size:35,

Now select Bevel & Emboss. style:inner bevel, technique:smooth, depth:205, direction:up,size:174, soften:16.
angle:120, altitude:30, highlight mode:screen color:#dbdbdb, opacity:75, shadow mode:multiply color:#64781c, opacity:75

Now select pattern overlay. Choose the grass pattern again that we used for our background.

Now select stroke. size:1, position:outside, angle:120, blend mode:normal, opacity:100,color:#000000.

You should now have something like this.

Now lets add our soccer players. Drag or insert the soccer players. Players might be to big at first but just resize them to the appropriate fixture.
 Posted in: about photoshop,andesta blog,basic photoshop,CS 3,CS 4,CS 5,photo effect,Photoshop,photoshop tutorials


0 comments:
Post a Comment