

 areyis


In this tutorial i will show you how to create a sleek Administration Panel Layout.For start you will need to create a new document
I will use Paint Bucket Tool to add a color over my white background. The color i have used is : efebe8

I will use Rectangle Tool to create the header of this Admin panel.

Bellow you can see the layer styles i have used for the header

I will create a shape also on the footer, and as you can see from the next image, i have used the same layer style.

Under the header shape i will create another one.

Here are the layer styles used for the second shape.


Under the second shape i will create another shape, with the same layer styles, but in this case i have used a darker color.

With Rectangle Tool i will create some shapes. These will be soon our buttons. As you can see i have used the same layer styles, but with different color for the first button.

I will create another shapes on the body of our layout. please click on the following image to see better my result.

Then i will create the header of the boxes. Of course i have used the Rectangle Tool, but this time i have used the dark layer styles.

Next step is to add some dark icons. You can use any icon you like
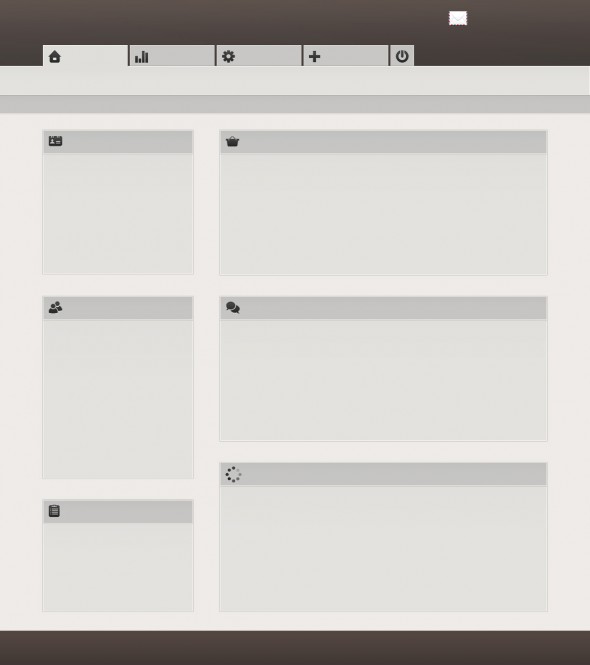
On the top right box i will create another shape. Here we will create a chart later in this tutorial where you can track the sales, traffic, or any other thing you like.

With Line Tool i will create some vertical lines. Please note that the lines need to be 1 pixel width.

With the same tool i will add some horizontal lines.

I will fill all my admin template with another horizontal lines like in the following image. Please click on the following image to see better my result.

I will add a small arrow on the header of each box, and then i will start to fill also each box with images, icons, and text.

As you can see i will use only Horizontal type tool to add some text. You can use different size for the fonts, and you can use also different colors.

I will return now to finish my chart. With Ellipse Tool i will create some small circles.

I will use the following layer style for the red dots. You can change the layer style for the green dots alone.

Then i will select Line Tool, and i will set the width to 3 pixels. I will create different lines with different colors.

On the top of the layout i will add another icons and text.

Then i will type some vertical text, with Vertical Type Tool.

I will fill all the boxes from the left side with text, and images. Here is my result so far.

On the top right side of the layout i will add another icon with a envelope, and over it i will add a badge similar with the badge you have on your Mac OS X Leopard. It seems on Mac OS X lion the badges are a little smaller.

Click on the following image to see the full size layout for my administration layout.
 Posted in: about photoshop,andesta blog,basic photoshop,CS 3,CS 4,CS 5,photo effect,Photoshop,photoshop tutorials


0 comments:
Post a Comment