

 areyis

we’ll first give ourselves a nice background gradient. Now while most gradients are two-color, in Photoshop you can actually make much more complex gradients by clicking on the Gradient icon in the top left

for example I’ve used the letter "Q" with blue- green color

I basically went through all the different types of layer styles and just experimented with them all. Decrease Fill Opacity to 20%,using different blending modes, and building the layers up slowly

here is the result of my layer style

Now hold down Ctrl and click on the Q layer to select the shape and add a white to transparent gradient coming from the bottom into a NEW layer.You can do color to transparent gradients by clicking on the Gradient Tool in the top left and holding it down to see the whole set of gradients

Now again hold Ctrl and select the Q layer. In a new layer, again add a radial white to transparent gradient, this time coming from the top down as shown. Fade this one out by setting its opacity to 40%

Now on the same layer as in the last step, draw an ellipse with the Selection Tool and hit Ctrl+Shift+I to select the inverse. Then hit delete to remove some of that gradient that we just drew

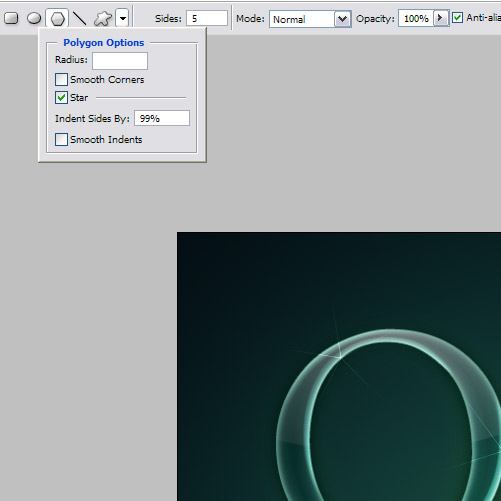
Glow glass shines, so lets add some highlights to make it look really shiny. You can do this by choosing the Custom Shape Tool (U) and then in the top left click on Polygon and then on the down arrow to get options as shown. Tick Star and make sure your indent is set to 99%
And there you have the finished,thanks to come to my photoshop tutorials
 Posted in: about photoshop,andesta blog,basic photoshop,CS 3,CS 4,CS 5,Photoshop,photoshop tutorials,Text Effect


0 comments:
Post a Comment