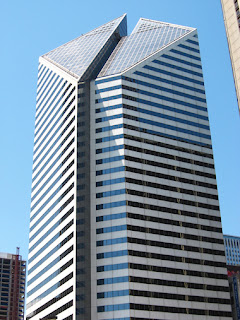
Now we learning a photoshop tutorials, how to make Dramatic Sunlight Effect with photoshop

The image used for this tutorial is from a chicago buildings
Once you have your image open click on the Gradient tool on the left side of your screen.
At the top of your screen the Gradient settings will appear. Click on the Gradient box shown above
in the Gradient Editor choose the three-colour preset circled above. We will tweak the red and the yellow colours a little, so first click on the central slider then on the Color box
Type in the colour ‘ff0054′ then click OK
click on the far right slider to change the yellow colour
Type in the colour ‘fffdc
Change the gradient to Radial, the Mode to Screen, and the Opacity to 90%
Click in the top left of the image where you want your light source to begin, then drag the cursor to the bottom right of the image
Click on the Adjustment layer button at the bottom of the layers panel and choose Gradient
pen the Gradient Editor and choose the second preset. Change the colour to the same yellow that you used for the first gradient ‘fffdcd’
Set the Style to Linear, the Angle to 125, the Scale to 100%, and tick the Reverse box
In the layers panel change the gradient layer’s blending mode to Screen and it’s Opacity to 90%
Now we will add another Gradient adjustment layer to darken the bottom right of the image
Use the same gradient preset as before but change the colour to black this time. Set the style to Linear, the Angle to -60, the Scale to 100%, and tick the Reverse button
Set the layer’s blending mode to Overlay, and it’s Opacity to 80%


 areyis


 Posted in:


0 comments:
Post a Comment