this day im try to make a photoshop tutorial "How to make a trendy Christmas 2011 Wallpaper in Photoshop
Showing posts with label photo effect. Show all posts
Saturday, December 10, 2011
Monday, November 14, 2011
Make a Girl Wallpaper with Photoshop
In this tutorial we are going to create a very cool looking Girl wallpaper. In this tutorial we will combine digital painting, some design elements and a photo to create an amazing wallpaper with photoshop
Create a new document with these dimensions.
I Found a stock image on deviantart.com - http://tatehemlock.deviantart.com/art/The-Act-of-Being-Polite-02-141273558
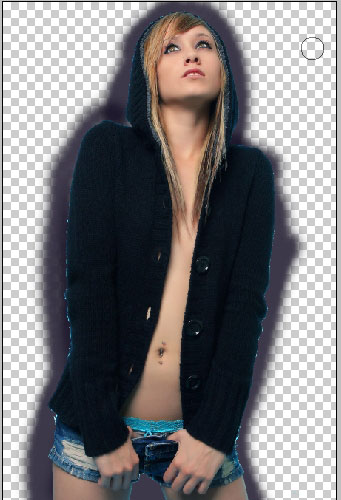
Open this image in a separate document. Our goal is to crop the girl from the background. There are many ways to do that, but in this situation I recommend you to use Magic Eraser tool - I think it is called so.
So let's start erasing that white color.
The Magic eraser does a lot to save time and it is very easy to erase monotone color backgrounds. it does a lot, but not everything - the edges of the objects do have a small edge line with different color pixel. IF you want to generate a good edged cut you must walk over the whole edge line. To view the other color pixels I recommend you to create a layer underneath the object you want to cut and fill or paint over the edges with different by contrast color.
Work extremely zoomed in to see and erase all the pixels you don't need.
Now when you have clear contour you can drag the girl to our initial document.
Create a document underneath the girl layer and fill it with
color - this will be the initial color to for further color tone harmony. I choose neutral Blue.
Then choose black to white gradient - set the layer Blending mode to Pin light and make several slide with this gradient giving us something like this effect. Note to turn Pin light.
As our effect is black color, we need to choose the right layer blending mode so we can see the initial blue color. Choose - and select the one you think is good. I've chosen soft light and the result is this.
Warp it a little bit.
Now it is time to bring some contrast: select soft edged brush with low flow parameters. Create a new layer underneath the Girl layer (set the layer mode to Overlay). Select something like light blue color; apply color on the top and near the head area.
Pick another color and paint a little bit with it too.
The next thing I did was - I began to apply glow to the character - the Girl. I'm going to use layer styles for that.
I've also applied some effects like small little bubbles using custom brush (on a new layer).
Zoomed out view:
So we've started to decorate with bubble brush let's continue to do this. i have another Good brush: here are the settings of the brush of you are using pen tablet.
How to Make a Nice Car Sport Wallpaper with Photoshop
Learn how to create a Nice Car Sport Wallpaper with Photoshop from a simple photos and brushes.
Firstly create a new file (File>New) of 1280×1024 px and 72 dpi. Let’s paint out the primary layer with black color, applying also the Paint Bucket Tool (G).
Find a Koenigsegg CCX photo on your wish, it’s recommended for it to be on a uniform background and cut it out with the Eraser Tool (E).
Place the car on our black background, as it is demonstrated next image:
Make a copy of this layer (Ctrl+J) and turn it over, using the Free Transform option (Ctrl+T)
Keep using the transforming mode and select the Warp option to change a little bit the car’s shape as to get its reflection.
Using the Eraser Tool (E), try to erase the unnecessary elements, as it is indicated next picture:
Download the brushes named Cloud Brushes and Vector Flower Brushes. The second one we’ll need a little later, but now select out of the first one the next indicated brush:
Create a new layer, using for it the color #ACF1E8 and draw on it a kind of cloud like the next one:
Select the Pen Tool (P) to represent the contour of a city, composed of two or three buildings. Select the same color as we did for the cloud. Place it the same way demonstrated below:
Make a copy of the last made layer, changing the color of the copy on #3F4A49
Choose out the earlier downloaded brushes, using them on a new layer the same way indicated below:
Select the colors #E9C16D and #79b3b0
Now we have to select the Line Tool (U) and the color #654143 to represent a diagonal line. Take then theMove Tool (V) and keep pressed Shift+Ctrl buttons while pressing also the pointer down. This way we’ll get copied the line each time we press the button.
Mark out all the created lines on the layers’ panel, pressing Ctrl button and selecting each layer with the mouse click. Then press Ctrl+E to put together the marked layers in a single one. Select for the new layer the Free Transform option to transform it the same way as you may see on the next picture:
Saturday, November 12, 2011
make a tatto at face with photoshop
Open up your stock image and duplicate it by clicking on the layer and dragging it to the New Layer icon down the bottom (it’s the one to the left of the trash can). Name this layer Base, desaturate it (Ctrl+Shift+U) and duplicate it again. The reason I am doing this is that I like to have multiple stages of my base image, just in case I mess up, so that I can come back at any given time and fix errors
Friday, November 11, 2011
how to surf photo manipulation with photoshop
Before we get started, lets compare the original with the result. As you’ll see we’re taking a great photo and making it really punchy by getting it really contrasty and changing the color palette
how to make the glow morning sunset with photoshop
Use my image from istock photo or ur mine. It’s a pretty gorgeous photo with great sunset lighting and contrast for us to build on lets start this photoshop tutorilas
Thursday, November 10, 2011
How to create an Administration panel layout with Photoshop
In this tutorial i will show you how to create a sleek Administration Panel Layout.For start you will need to create a new document
Monday, November 7, 2011
create a eye logo to make wallpaper with photoshop
next lesson we'll see how is it possible to make the wallpapers by combining several of them. We'll see also how to work with the light, increase the picture's quality and create the effect of a pressed text
Wednesday, November 2, 2011
How To Create Blast In The City Effect In Photoshop "City in Attack"
In this tutorial you will learn how to create a war scene which contains some fighter planes and a big explosion.This step-by-step tutorial is also available for download so you can save it on your computer for later usage
Thursday, October 20, 2011
how to make windows 7 wallpaper with photoshop (fish in Aquarium)
Now we learning a photoshop tutorials, how to make colour love with photoshop and its the final result :
Tuesday, October 11, 2011
make a windows 7 creation wallpaper
In this tutorial I will make a creation about windows 7 wallpaper,lets do it
Let’s create a new file (File>New), having 1920x1200px/72ppi with white background. Then choose the Rectangle Tool (U) and represent a rectangle as shown:


ar3y