

 areyis

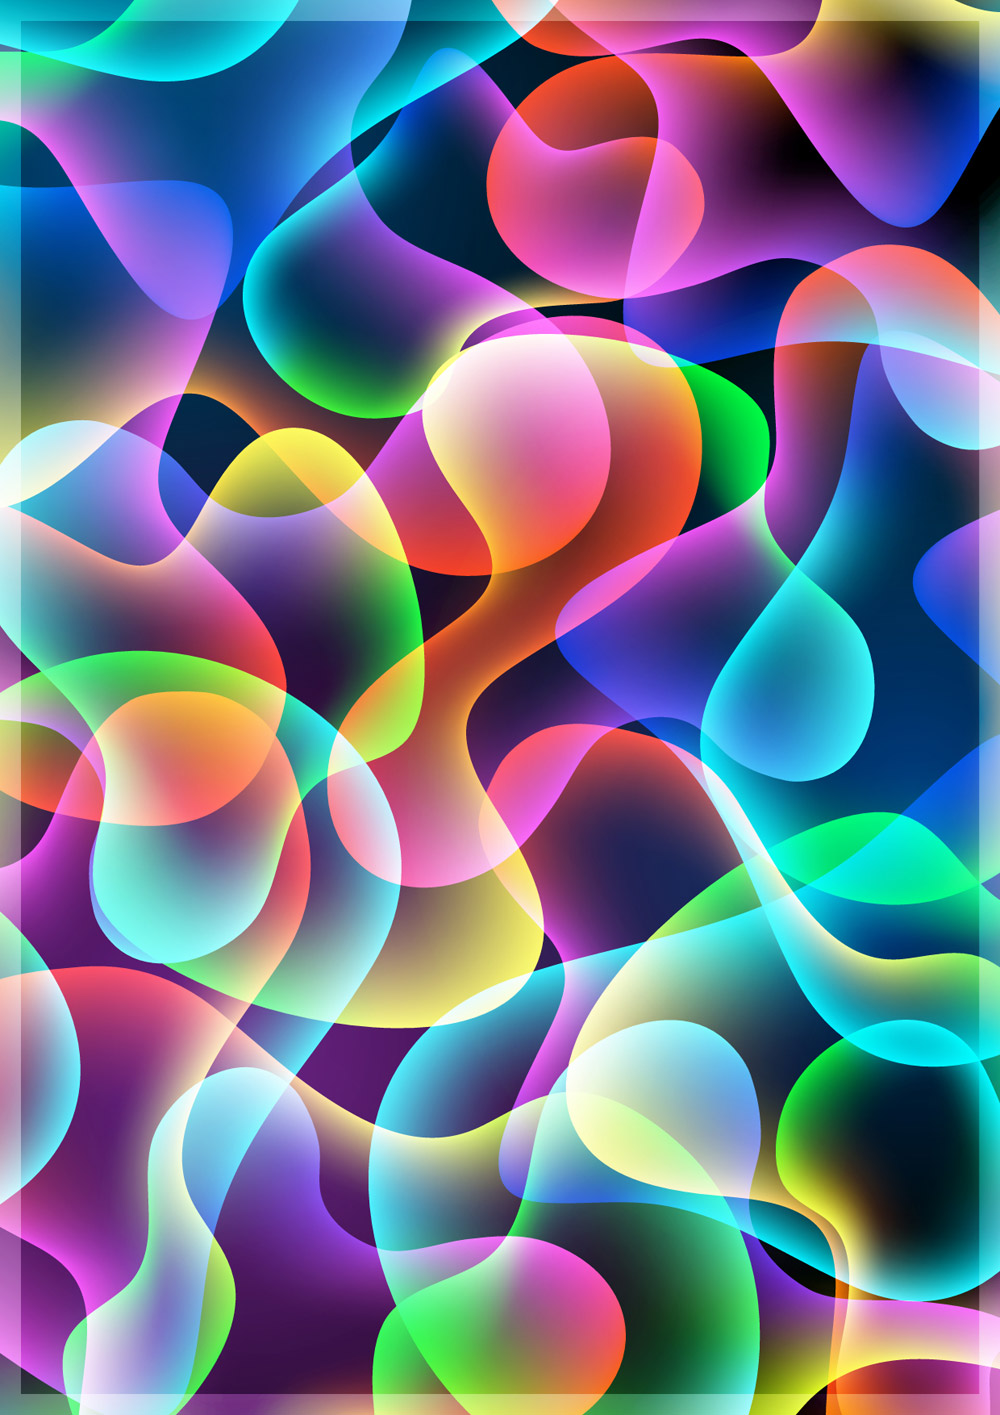
Follow this step by step Illustrator tutorial to create a vibrant abstract design. We’ll put Illustrator’s Gradient Mesh tool to use to create a colourful shape, then build up layers of objects to create an abstract design with lots of vibrancy, bright colours and transparency effects.
The design we’ll be creating features a range of vibrant and colourful shapes which stack to produce an abstract array of bright and electrifying colours. The design is entirely made of vector elements so it can be scaled to any size you wish, whether it’s an iPhone wallpaper or super sized poster.

Open up Adobe Illustrator and create a new document in RGB mode. Place a black rectangle across the artboard as a background then set up the Pencil tool with a moderate smoothness setting. Draw a random shape with your mouse or pen tablet with an aim to keep the outline nice and smooth. Correct any lines by re-drawing while the shape is still selected.

Go to Object > Create Gradient Mesh and give the shape 3 rows and columns. The gradient mesh adds extra points in the centre of the shape which we’ll use to give the shape the various colours.

Use the Direct Selection tool to select the four inner points and give them all a black fill.

Use the Lasso tool to draw a looping selection around a collection of points in the lower left then give these points a bright red fill.

Continue around the shape selecting groups of points and giving each collection a fill according to the colour spectrum.

Once you’ve made your way around the shape it should be completely filled with red, orange, yellow, gree, blue and purple with each colour flowing smoothly into the next.

Repeat the process with another random shape, then change the blending mode of both objects to Screen. This will render the black centre transparent.

Hold ALT while dragging a shape to duplicate it, then scale and rotate various duplicates of each object to begin filling the document.

Add duplicates to the full width and height of the artboard and extend the shapes beyond the edges so the whole document is filled with abstract shapes.

As the lines overlap each individual shape becomes disguised amongst the array of vibrant colours. The effect looks similar to groups of jellyfish when seen against UV light.

Draw a couple of large circles and give them a gradient fading to black. These will be used to spice up the design with colour casts.

Change the centre colour then change the blending mode to Screen. Adjust the transparency to tone down the impact of the colour casts.

Add a couple more gradient circles, this time with a white fill. Change these shapes to Soft Light to add subtle highlights to the design.

Select everything on your artboard and group them together. Draw a rectangle to match the outline of the artboard, then with both the group and rectangle selected go to Object > Clipping Mask > Make.

Draw another rectangle to match the size of the artboard, but give this one a white stroke. Align the stroke to the inside and increase its size. Change the blending mode to Soft Light to add a nice framing border to the design.

Export your electrifying vibrant design for use as a desktop wallpaper, poster or whatever takes your fancy. The simple steps of building up layers of colourful shapes soon brought this design to life.
 Posted in: about photoshop,advance tutorials,andesta blog,CS 3,CS 4,photoshop tutorials


0 comments:
Post a Comment