Start working by creating a new document (Ctrl+N) in Adobe Photoshop CS5 with the size 1280px by 1024px (RGB color mode) at a resolution of 72 pixels/inch. Use the Paint Bucket Tool (G) to fill with #42361E color the new background layer.
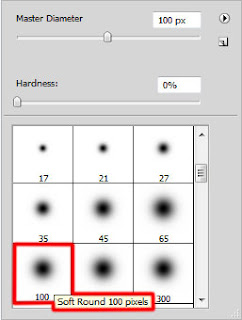
Create then a new layer and select the Soft Round brush from Brush Tool (B). Set Foreground color to #19194E.
Use this brush to paint as shown the left part of the canvas.
Next we’ll represent a small ellipse, using the Ellipse Tool (U). Foreground color is #2C32ED. Set the Blending mode for this layer to Lighten.
Insert the mask on the layer by choosing Add layer mask on the bottom part of the Layers panel and choose the Soft Round brush of black color (set Opacity to 15% in Options bar).
Paint in the mask using this brush to hide the central part of the ellipse as shown.
On the next new layer we’ll paint with the same Soft Round brush the circle’s surface, firstly applying the yellow color and then the blue one.
We’ve got the next result:
Hold down Alt (Windows) or Option (Mac OS) and click between layers containing the brushstrokes and the circle’s layer in the Layers panel to create a clipping mask.
We’ve got the next result:
Next we’ll represent one more ellipse of the color #8B9BAB, applying the Ellipse Tool (U).
Set the Blending mode for this layer to Overlay.
Create a new layer and select the Soft Round brush.
Use this brush to paint the top part of the ellipse with red color.
Hold down Alt (Windows) or Option (Mac OS) and click between layers containing the brushstrokes and the ellipse’s layer in the Layers panel to create a clipping mask.
We’ve got the next result:
Set the Blending mode for this layer to Overlay.
Select the Ellipse Tool (U) to represent the next ellipse of red color too.
Set Fill to 57% for this layer.
Insert the mask on the layer by choosing Add layer mask on the bottom part of the Layers panel and choose the Soft Round brush of black color (set Opacity to 15% in Options bar).
Paint in the mask to hide the bottom part of the ellipse the same way demonstrated below:
Create a new layer and select again the Soft Round brush.
Use this brush to paint the ellipses’ surfaces.
Set the Blending mode for this layer to Hard Mix.
Hold down Alt (Windows) or Option (Mac OS) and click between layers containing the brushstrokes and the ellipse’s layer in the Layers panel to create a clipping mask.
We’ve got the next result:
Create a new layer and apply on it the Soft Round brush of the color #ECEC42 (Opacity – 60%) to paint the ellipse:
We’ve got the next result:
Set the Blending mode for this layer to Hard Mix.
Create another new layer and apply here the Soft Round brush to paint it with the color #5F56F9 (Opacity – 20%)
We’ve got the next result:
Set the Blending mode for this layer to Dived.
Select the Custom Shape Tool (U) in the Tools bar, in the Options bar click the Shape to open the selection menu. Find Heart at the bottom of the menu, and then double-click a shape thumbnail to select it.
Click and drag to draw a small heart of black color.
Make a copy of the last made layer with the heart on it and use the Free Transform (Ctrl+T) command to change the copy’s sizes. Set Fill to 57% for this layer.
Click on Add a layer style icon from bottom part of the Layers panel and select Inner Shadow.
We’ve got the next result:
Insert the mask on the layer by choosing Add layer mask on the bottom part of the Layers panel and choose the Soft Round brush of black color (set Opacity to 15% in Options bar).
Paint in the mask using this brush to hide the heart’s right side as it is demonstrated next picture.


 areyis


 Posted in:


0 comments:
Post a Comment